
WWII Hungarian tanks and vehicles
Bryan’s step by step painting guide
Hi guys, welcome to another step-by-step painting guide. This time for WW2 Hungarian tanks and vehicles. This guide covers the dark green colour scheme common for the later years of the war. The same principles can be followed for the earlier vehicles by just adding your camouflage colours into the basic colours stage and using the appropriate early style insignia decals.
Step 1 - Coloured primer
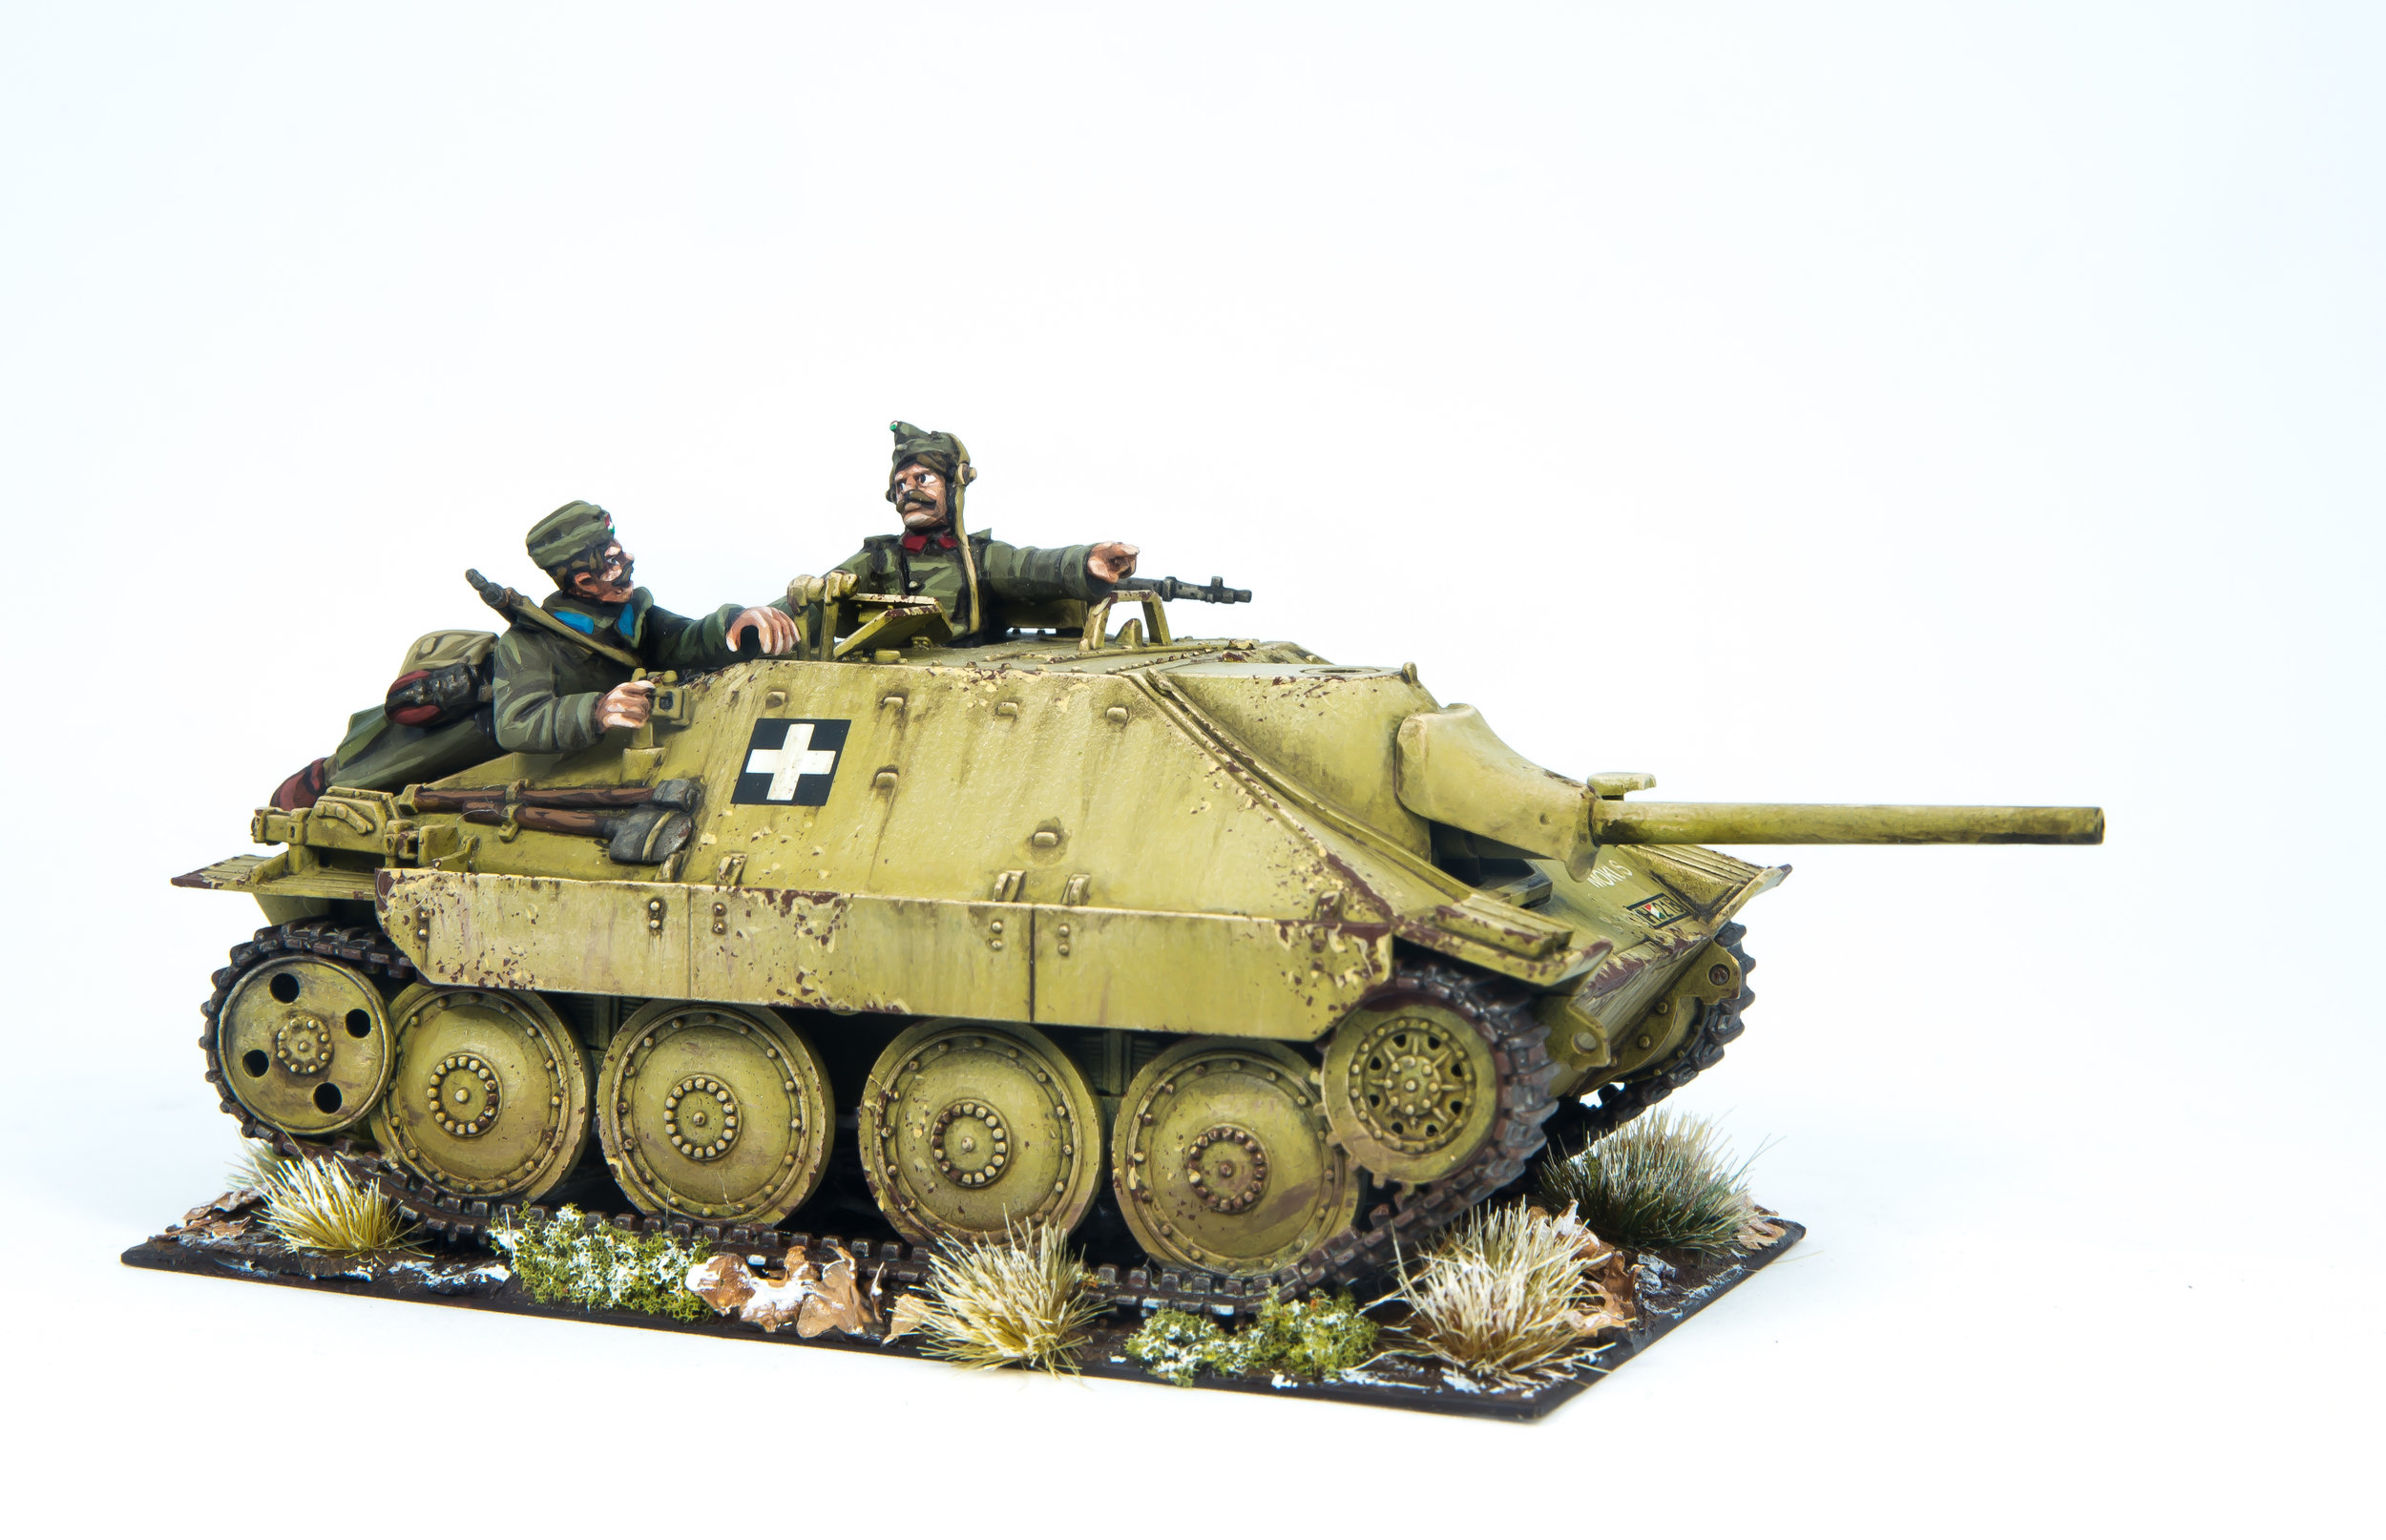
These Hungarian vehicles are resin miniatures by the wonderful Mad Bob Miniatures. At this stage this is the place to get your vehicles from, with Warlord Games also starting to add some vehicles to their range. I’ll be using a Toldi IIa tank and Botond truck as the examples in this guide.
After cleaning up the miniatures and assembling them, they were given a coat of black spray primer. Once this is dry, apply a further spray coat of the main base colours. For the green hull of the tank and truck I used a spray can of TS-23 Luftwaffe light green (Tamiya). You could also use the slightly darker Angel Green (Army Painter).
I did leave the truck in sub assemblies as you see above, which meant I could spray each part the appropriate colour separately. So the chassis is green, the tyres remain black and I sprayed the canvas cover with TS-68 Wooden deck tan (Tamiya). The equivalent is Karak Stone (Citadel) or German Camo beige (Vallejo). Do not assemble the different coloured parts just yet though.
Step 2 - Drybrush highlight
It’s best to give the green vehicle hulls a dry-brush highlight now before other colours are applied, meaning no clean up is required. Simply take a large, soft-bristled,brush and wipe off most of the paint before applying large sweeping brush strokes over the whole vehicle. The paint should catch the raised edges and apply highlights like the image below. For increased effectiveness it’s a good idea to apply the brush strokes downward. The green hulls are highlighted with a 50/50 mix of Intermediate Green (Vallejo) and Straken Green (Citadel)
Step 3 - Chipping
The next stage is rather messy too, so it’s best done now before the other base colours are applied. To simulate chipped paint on the green hull follow the steps below.
STEP 3.1: Using a piece of ripped foam (like that found in blister packs or figure cases),apply dabs of Straken Green (Citadel) to areas of the hull that would logically receive damage and wear, such as the front edges of the hull and areas the crew would use to access the vehicle. Be sure to remove most of the paint from the foam before you apply it to the miniature. Less paint is better and you can always build up the effect by dabbing multiple times in the same area to build it up.
STEP 3.2: Now, using a fine detail brush, carefully paint small areas within the largest areas of the light green chipping using German Camo Dark Green (Vallejo). This adds depth to the chipping.
Here you can see examples of how I have applied the sponge chipping to the hull of the Botond Truck. I did this with the wheels still separate to avoid getting green on the black tyres, then glued them on afterwards.
Step 4 - Basic colours, decals & gloss varnish
In this step we will complete the basic colours for the vehicles and add decals before we jump into weathering the vehicle in the next stage.
STEP 4.1: Using are larger brush you don’t mind getting a bit roughed up, paint the tracks with Flat Brown (Vallejo). Make sure the paint is slightly thinned down with water so the paint flows easily into all the crevices. Once dry, drybrush the tracks with Leadbelcher (Citadel), note that I forgot to do this stage before photographing the tank.
STEP 4.2: Carefully paint the road wheel rims with German Grey (Vallejo).
STEP 4.3: Add any waterslide decals you have planned, it’s a good idea to apply these now so the weathering goes on top and it looks more natural. I have added the later war Hungarian national symbol of the white cross on black square (used from 1944 onwards) and basic vehicle registration/identity plates. Before applying the decals I use a paint on gloss varnish to rough coat the areas where the decals will be going. This creates a very smooth surface, which is better for the decals to adhere too. Ardcoat (Citadel) is an easy to find product for this. Using an old brush, I take the waterslide decals out of the water and carefully place them onto the miniature where I want them, smoothing out and adjusting them with that same brush.
STEP 4.4: Coat the entire model in gloss varnish, spray or hand painted are both fine. This is a very important stage as the gloss varnish (matt will not be strong enough!) will protect all your work so far from the enamel and oil products that are used to weathering the vehicle in the next stage.
Step 5 - Camouflage
If your vehicle has a camouflage pattern canvas cover like this Botond truck, now is the time to paint that before the next steps.
STEP 5.1: Base coat the canvas in a spray of TS-68 Wooden deck tan (Tamiya). The equivalent is Karak Stone (Citadel) or German Camo beige (Vallejo).
STEP 5.2: Apply the green areas of the camouflage pattern using Medium Olive (Vallejo). To help map out the pattern and give yourself a starting point, begin by roughly painting a thin green line around the shapes you want to remain beige. This then gives you the areas you need to fill in with the green. You can use the pic below for reference.
STEP 5.3: Now apply the brown areas of the camouflage pattern using Flat Brown (Vallejo). This is mostly painted over the top of green sections of the camouflage. You will notice that the brown shapes nestle up against the beige areas. Use the pic below and the historical photos included as a visual reference for the pattern.
Step 6 - Shading wash and streaking grime
At this point it’s time to switch over from acrylic paints to oil and enamel products that help shade the colours underneath and produce the various weathering effects.
STEP 6.1: We begin by applying an enamel wash of Dark Brown, for green vehicles (AK Interactive) This is applied in a ‘pin’ wash fashion, not a complete covering of the green hull.
Use an older, cheap brush (as the enamels will really wreck your brushes over time) to paint the wash directly into the crevacises and areas that will provide the shadows on the green hull. You don’t have to be super accurate as this stage is followed by a clean up stage where any unwanted shade will be smoothed out or removed using white spirit. This is one of the strengths of the oil paints, you can adjust after applying them. See the image below for how I went about adding the wash to my tanks hull areas. For the tracks and wheels, simply wash the entire area.
STEP 6.2: This is the ‘clean up’ step where you remove any excess wash and also create the streaking effects at the same time. You will need a flat bristle brush (as pictured below) and an old rag plus of course some white spirit (I use artists turpentine). Pour some of your white spirit into a spare plastic or glass container, this will keep it from contaminating the bottle with paint. Now dip your flat brush into your small container of white spirit and then dab it onto the rag to remove the majority of it, less spirit is better than more.
Use the flat brush dampened by the spirit to wipe away any areas of wash that are on the raised areas of the hull. While doing this you can also wipe or drag the brush in a direction that will pull some of that wash down into streaks on the various large areas of the hull, be sure to follow the direction of gravity for a natural looking result. See the picture above for reference. The brush with spirit will allow you to feather and soften the wash as well, creating gradients from dark to light across areas. Using too much spirit on the brush will completely remove the wash, so be careful to use only a tiny amount and brush several times to get the result you want. Be sure to constantly dab your brush back across onto the rag to remove the excess paint you pick up as you remove the wash. This technique takes a bit of practice, so it’s a good idea to experiment on a spare bit of plastic. The tracks and wheels can be cleaned up simply by wiping the rag dampened in spirit over the model and the wash will be removed from the raised edges.
Step 7 - Dirt and dust effects
The final step is to apply some dust or dirt to the vehicle, this is done last as it would naturally coat the top layer of anything anyway.
STEP 7.1: I am using a powdered pigment product to create the dust and earth on the vehicles, Dark Earth (Ak Interactive). The powder can be applied as is straight to the vehicle with a soft short brush (the blue one in the photo) and can also be mixed with some white spirit to create a wash.To make the wash it’s best to use a pipet to drop some spirit into a small amount of powdered pigment in a small container and mix it up with an old rough brush.
STEP 7.2: Once the “wash” is mixed, use a thin brush to work it into any recessed areas that you think dust and earth would gather. The liquid white spirit will evaporate over the next few hours and leave only the powder, giving a more natural look.
STEP 7.3: After giving it about 24 hours to fully evaporate and dry, gently coat the areas with pigment powder in a product called Pigment Fixer (AK Interactive). This will seal the powder in and stop it from being rubbed off.
The final stage is to give your newly painted vehicle a coat of matt varnish, I recommend Testors Dullcoate for spray on and AK Interactive Ultra Matte for paint on.
Here are a few more examples of finished Hungarian vehicles in an alternative colour scheme, the Dunkelgelb common of German supplied vehicles. To paint these simply swap the green coloured spray in the guide for Tank Warspray Mid-Late War German Dunkelgelb (Plastic Soldier Company) or the new Panzer Yellow (Vallejo Hobby Paint Spray) and use Iraqi Sand (Vallejo) as the highlight colour for the dry-brush and chipping.


Another alternative scheme is the early war three tone camouflage, these are some examples. The Csaba armoured cars and the Nimrod SPAA vehicles both use the same green hull as in the tutorial, but add coloured splotches of sand and a brown. I hand painted these colours after the green hull was complete and used Flat Brown (Vallejo) and Khaki Grey (Vallejo). Also note the early war style markings with the red and green national symbol.


Thanks for checking out this painting guide.
Bryan