
Galloping Major Wargames British Line Infantry Painting Tutorial
Hi All, Jimbob here with my very first painting tutorial. Being my first ever tutorial I decided to jump in at the deep end and show you all how I painted my 28mm British Redcoats for a forthcoming French Indian War (FIW) based Sharp Practice event I am attending.
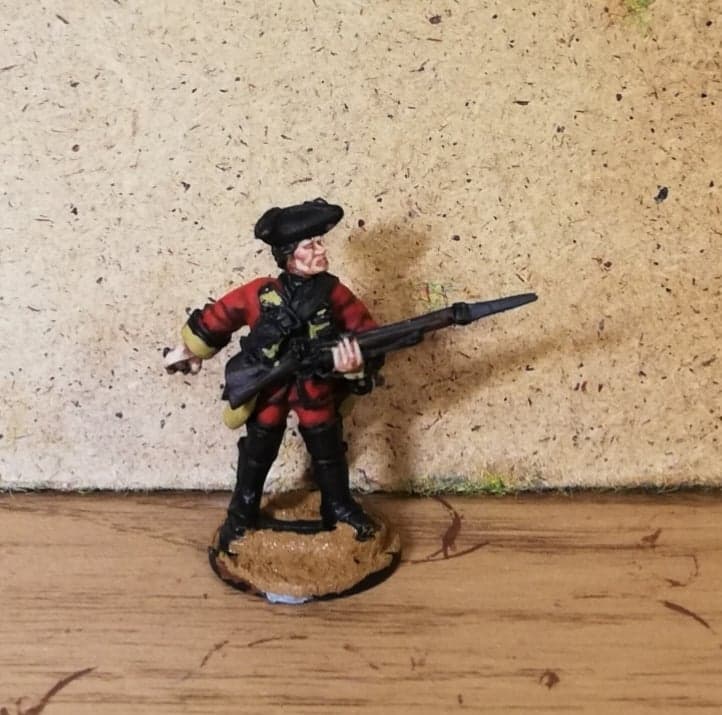
I used the excellent FIW figures from Galloping Major. To my mind these are the best 28mm figures available for that period. The detail is excellent and the posing of the figures is wonderful.
Anyway, to start with I always give any metal figures I am painting a soak in some Dettol disinfectant and a good scrub with warm soapy water to remove any lingering release agent before I prime them with GW Chaos Black spray paint.
From there I paint the flesh first. I apply a base layer of Red Leather from Vallejo (you might need to add a couple of coats of this). After this I apply Coat D’Arms Suntanned Flesh with a touch of Red Leather to all the upper and vertical faces on the flesh, leaving the recesses in the base colour. Next I apply Coat D’Arms Suntanned flesh on the upper parts of the flesh. This is followed by mixing in some Vallejo Base Flesh to the to Suntanned flesh and this is applied to the uppermost parts of the flesh. Lastly, I mix in a touch of red with some Suntanned Flesh to get a rosy pink and add a touch of this just under the cheek bones and on middle of the lower lip.


Next I tackled the jacket. This is very nicely detailed which makes applying the colours a lot easier, especially the braining and trim. Starting with the red I applied a basecoat of Vallejo Black Red.


After that I painted on Vallejo Red to the upper and face on surfaces leaving the black red in the recesses.
I then mixed the red with some Vallejo Carmine Red and applied that to upper and topmost surfaces.
Lastly pure Carmine Red was painted onto the top surfaces.
The 44th Regiment of Foot had yellow facings so their turn backs and cuffs were painted next. Onto the black primer I painted a layer of Vallejo Ochre Brown.

Some Vallejo Flat Yellow was then mixed with Ochre Brown till it looked noticeably different from the base coat. This was then applied to the uppermost and top surfaces.
Lastly, pure Flat Yellow was applied sparingly on the top surfaces.
For the lacing, firstly I gave it all a carefully applied coat of Vallejo Neutral Grey and then mixed Vallejo White to the Neutral Grey and applied it. If you feel so inclined a final touch of pure white can be added to the topmost surfaces of the lace. This should be done at least to the braid on the tricorne.
You’ll be glad to hear we’re nearly done, it was time to do his leggings. These received a base coat of Vallejo Cammo Med Brown. I then mixed the Cammo Med Brown with some Vallejo Cork Brown to get a mid tone and applied that as I have with the other mid tones above. Lastly, a mix of approximately 1 part Cammo Brown and 3 parts Cork Brown was applied to the upper and top most surfaces.
And that was him done. I hope this was a helpful guide to painting a FIW Redcoat.
Cheers,
Jimbob