
Star Wars Rebel Fleet Troopers painting guide
Star Wars Rebel Fleet Troopers
Bryan’s step by step painting guide
Hi guys, welcome to another step-by-step painting guide, this time for the Rebel Fleet Troopers from Star Wars Legion. What follows is a guide, broken down into easy to replicate stages which covers the classic look uniforms as seen in the films. The method is best for painting a unit of 7 or so miniatures at a time.
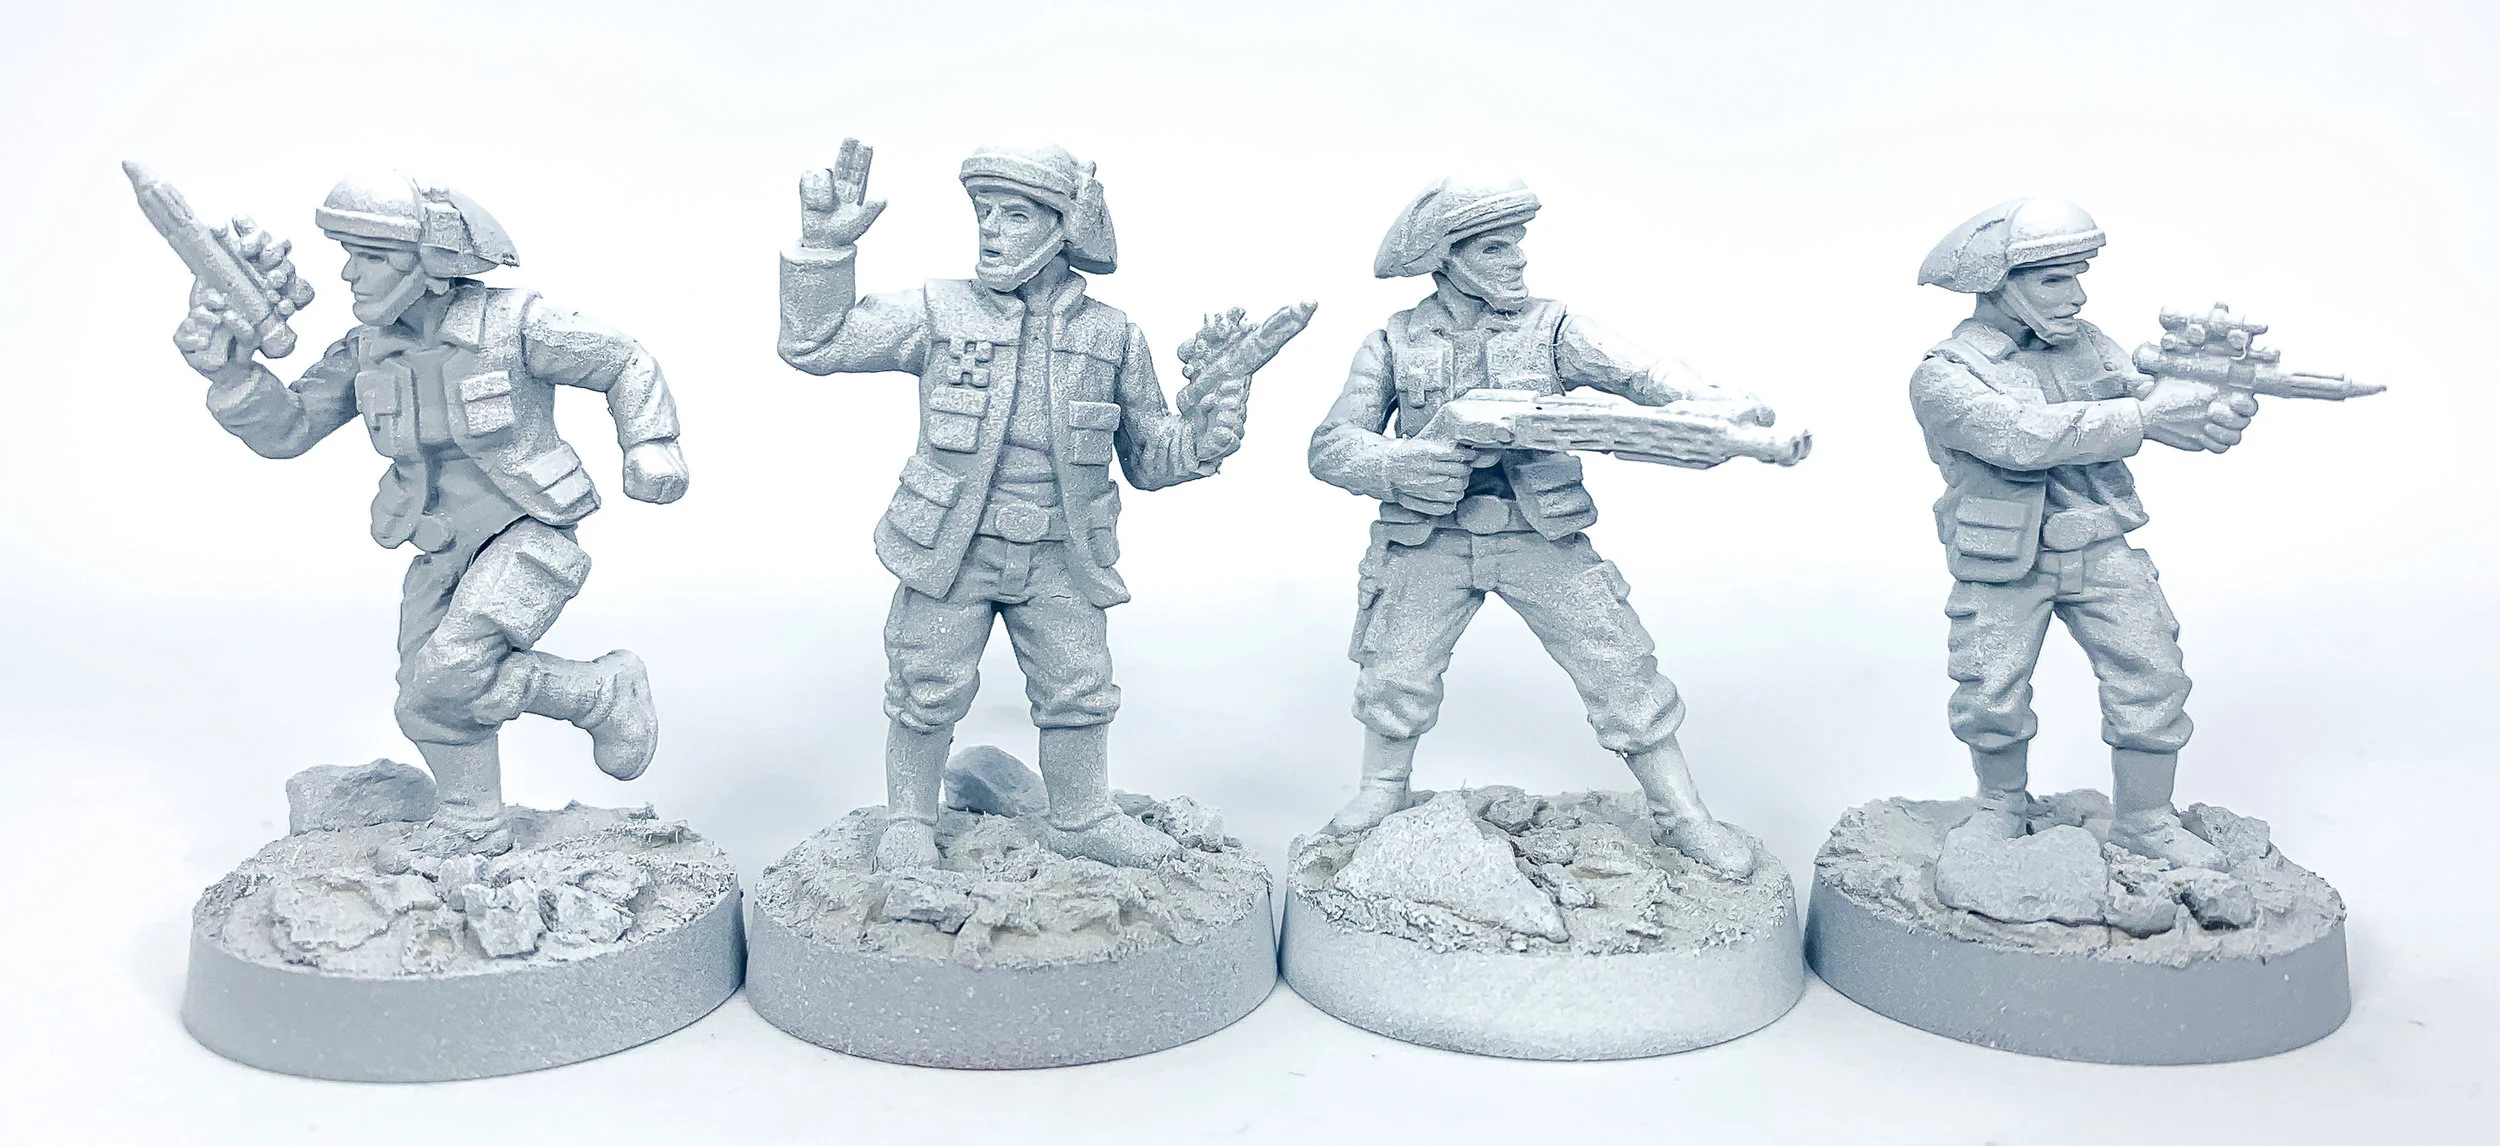
Step 1 - Zenithal spray primer
In this stage the miniatures are primed and at the same time given a basic shade. Begin by priming your models with Grey surface primer (Tamiya), or indeed any other light grey you prefer. Once dry, apply a second spray coat, this time with a white. I used White surface primer (Tamiya), but again, use any white you wish. The difference this time is to only apply the spray from above. Hold the can on at least a 45 degree angle, and ideally from directly above, and just coat the top of the miniature, leaving the recesses the original grey. Effectively we are laying down a shaded base coat for the white helmet and indeed the whole model. The term Zenithal comes from the way the suns light hits objects at it’s zenith, and creates the shadows we are replicating with the spray cans.

Step 2 - Base colours
The next step is to start laying down some base colours. I have chosen colours to paint the Fleet Troopers exactly as seen in the films. It is very efficient to paint the base colours in two stages, beginning with the lighter colours, as this means zero clean up as the darker colours come later and cover any mistakes;
Skin: Cadian Fleshtone (Citadel)
Trousers: Stomvermin fur (Citadel)
Shirt: Fenrisian Grey (Citadel)
Officers tunic and trousers: Baneblade Brown (Citadel).
Officers tunic shoulder pads: Skrag Brown (Citadel).
Step 3 - More base colours
This second round of base colours will complete the first layer, the darker colours covering over any mistakes with the previous base colours applied.
Belts and pistol holsters: Flat Brown (Vallejo)
Belt buckles and blaster pistols: Leadbelcher (Citadel)
Boots, vests, chin straps and blaster pistol casing: Matt Black (Army Painter)
Officers boots: Flat Brown (Vallejo)
Officers shirt: Dryad Bark (Citadel)
Officers trouser stripes: Matt Black (Army Painter)
Officers rank insignia: Leadbelcher (Citadel) for the square and Kantor Blue (Citadel) for the buttons.
It’s a good idea to touch up the small chin guard with some white as it’s probably been painted over with flesh or black by this stage too.

Step 4 - Highlights
It’s now time to start adding some depth to the colours by painting on the highlights. In this method I paint the highlights BEFORE the washes, which are applied in the following step. I do this to save time and avoid having to carefully blend up through the highlights, as the wash will help pull it all together and fill in the gaps a bit, creating smoother transitions between the shadows, mid tones and highlights. This is a useful strategy for painting armies worth of miniatures as it’s very efficient, you just need to compensate for the wash darkening things down by using rather strong highlights. Carefully paint the lighter highlights to the raised areas with a fine detail brush, for this I for used a 00 size from Windsor & Newton Series 7. When you water down these colours use an older brush to do so, don’t wreck your fine detail brush with this task. Most areas were highlighted with one to two successive highlights as noted below:
Skin: Kislev Flesh (Citadel), then Flayed One Flesh (Citadel)
Trousers: 60/40 Stomvermin fur (Citadel) and Pale Sand (Vallejo)
Shirt: Ulthuan Grey (Citadel)
Belts and pistol holsters: Skrag Brown (Citadel)
Boots, vests, chin straps and blaster pistol casing: German Grey (Vallejo)
Officers tunic and trousers: Karak Stone (Citadel)., and then 50/50 mix of Karak Stone (Citadel) and Pallid Wych Flesh (Citadel)
Officers tunic shoulder pads: Deathclaw Brown (Citadel).
Officers boots: Skrag Brown (Citadel)
Officers shirt: Gorthor Brown (Citadel), and then Baneblade Brown (Citadel)
Officers trouser stripes: German Grey (Vallejo)


Step 5 - Washes
It’s now time to adding some real definition and blend the highlights together with the base colours by using washes. I mixed my washes with a little Lahmian Medium (Citadel) to help them flow better into the recesses and not stain the whole area so much. An optional but recommended step is to also gloss varnish the entire model before applying the washes. The extremely smooth surface finish it creates will really push the washes to where they need to go in those areas shadows should be. Make sure you let the gloss varnish dry before you apply washes!
Skin: Riekland Fleshshade (Citadel)
Trousers and metal areas: Dark Tone (Army Painter or Nuln Oil (Citadel)
Shirts: 70/30 mix of Nuln Oil (Citadel) and Drakenhof Nightshade (Citadel)
Belts and pistol holsters: Skrag Brown (Citadel)
White Helmets: 50/50 mix of Nuln Oil (Citadel) and Lahmian Medium (Citadel)
Officers shirt, tunic, boots and trousers: Agrax Earthshade (Citadel)
Base: Seraphim Sepia (Citadel)

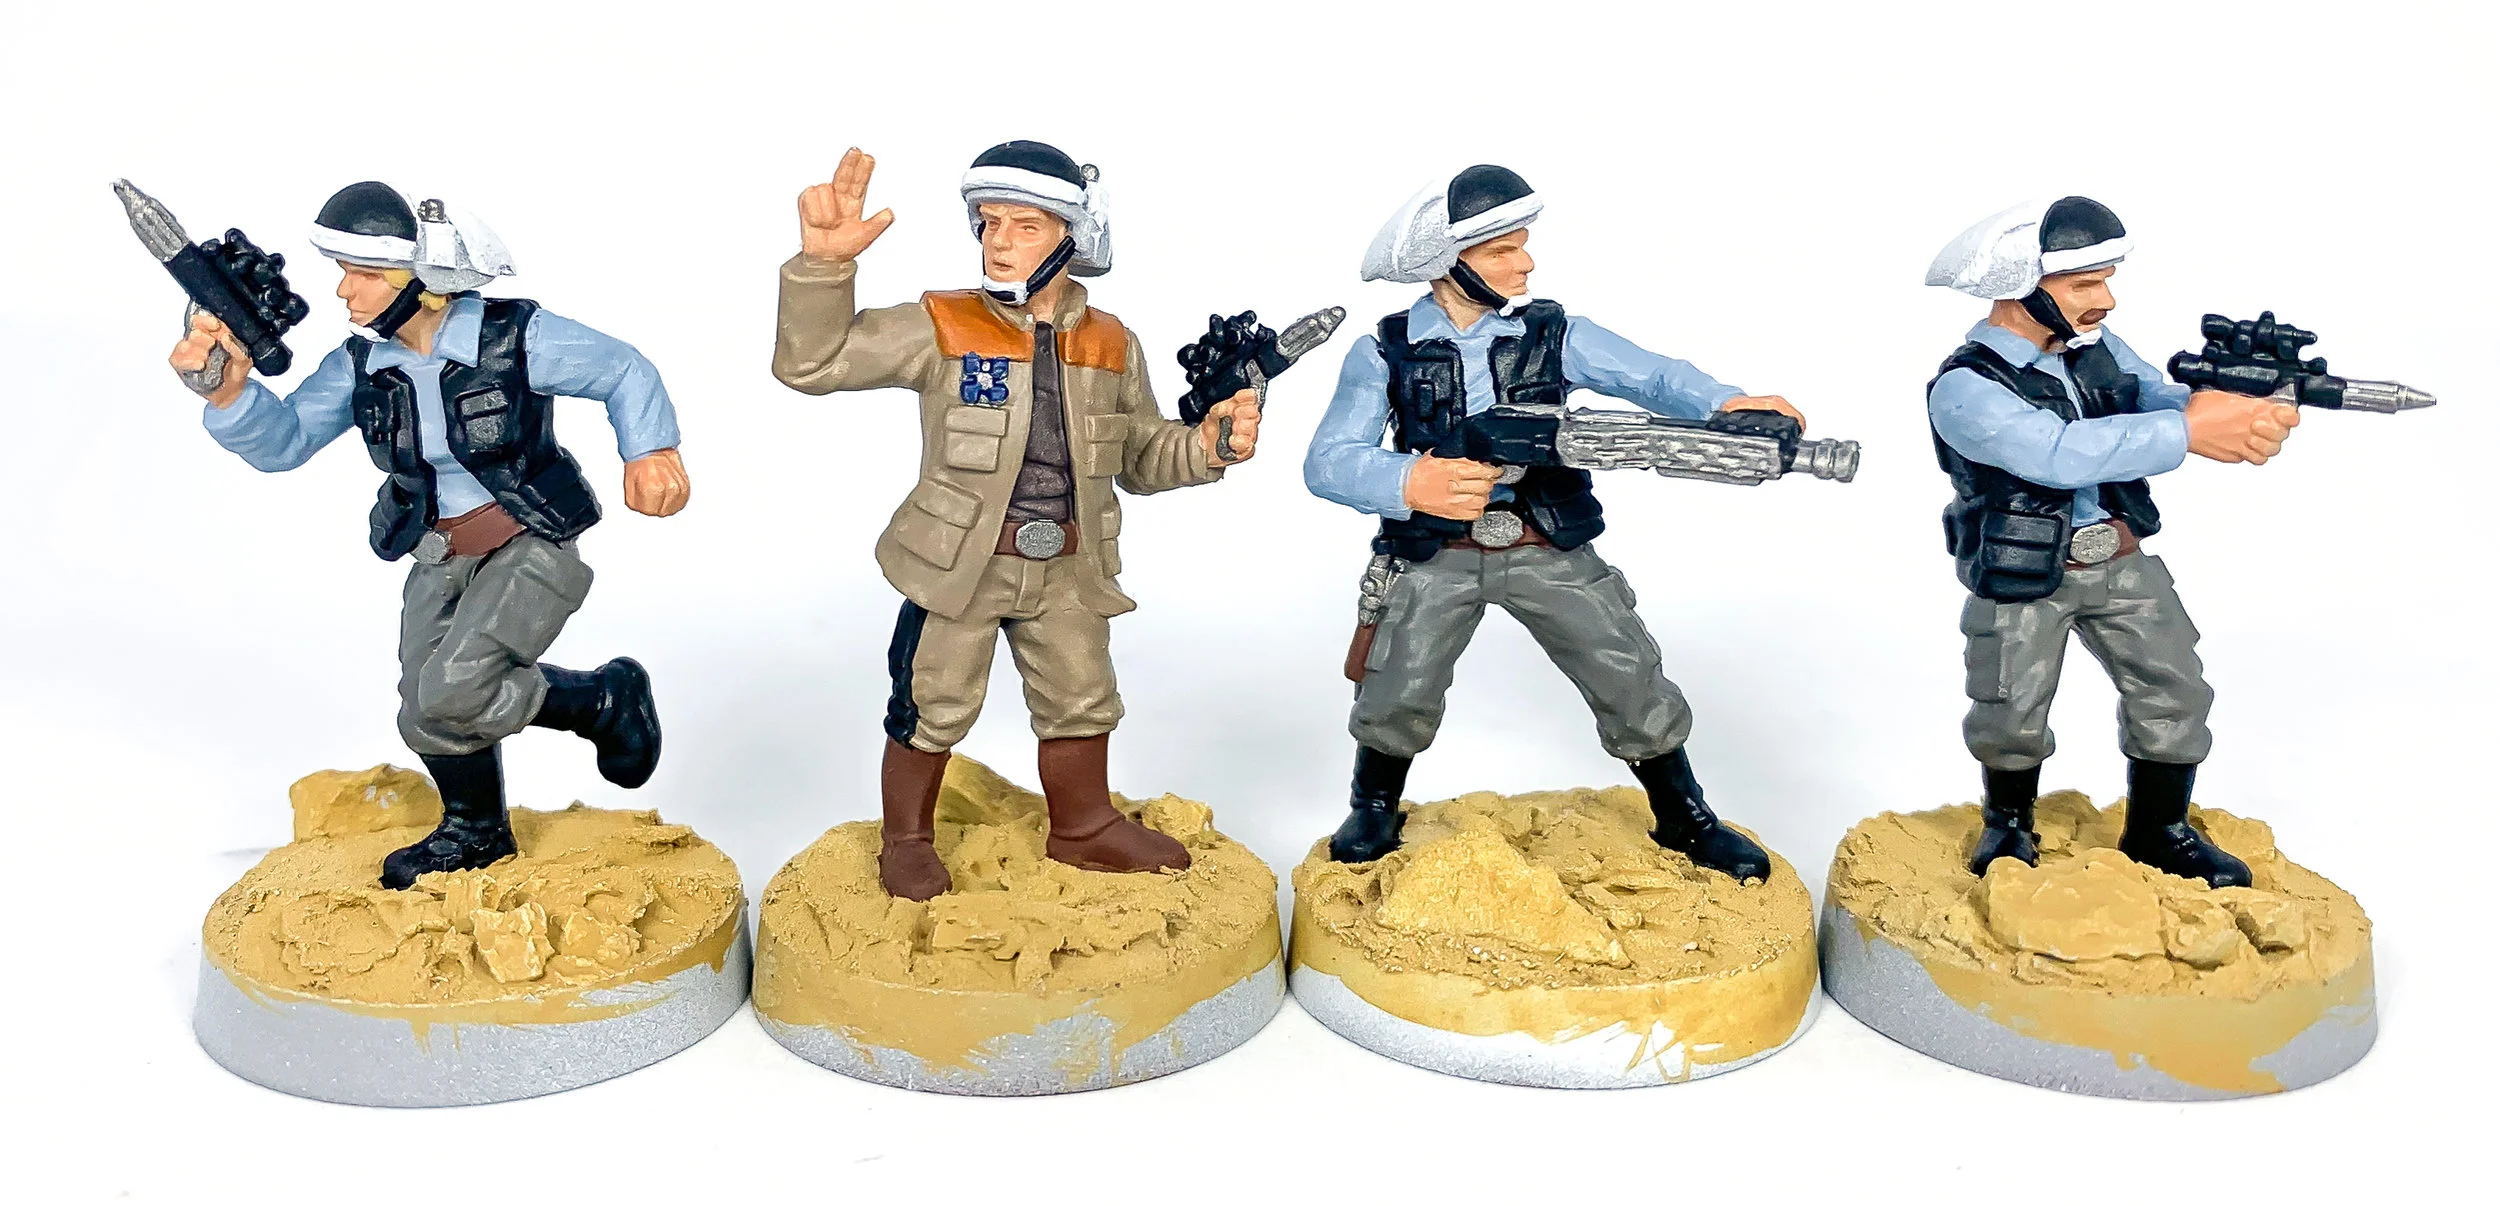
Step 6 - Finishing touches, Matt varnish and basing material
To finish off the Fleet Troopers it’s now time to paint the eyes and complete the bases. Painting the eyes is of course optional, but the way I do it is to first paint a very thin white line horizontally in the eye sockets. I make sure to leave some of the shaded flesh area around the white. I then carefully paint a black dot in the middle of the white line for the pupil. Easier said than done, but just keep practicing and don’t be worried that you may have to re-do some of the eyes that don’t work out.
Next, dry-brush the bases first with Iraqi Sand (Vallejo) and then Pale Sand (Vallejo). To finish them off paint the base trim with Flat Earth (Vallejo), this may take two thin coats to get an even finish.
With the entire model painted you should now consider varnishing to protect your models from the hazards of tabletop gaming and grubby fingers. I used a matt varnish spray, Testors Dullcoate.
The last touch is to add some flock and other basing material to really set the scene. I used desert tufts from a Gamers Grass, and “winter” flock from Woodland Scenics.
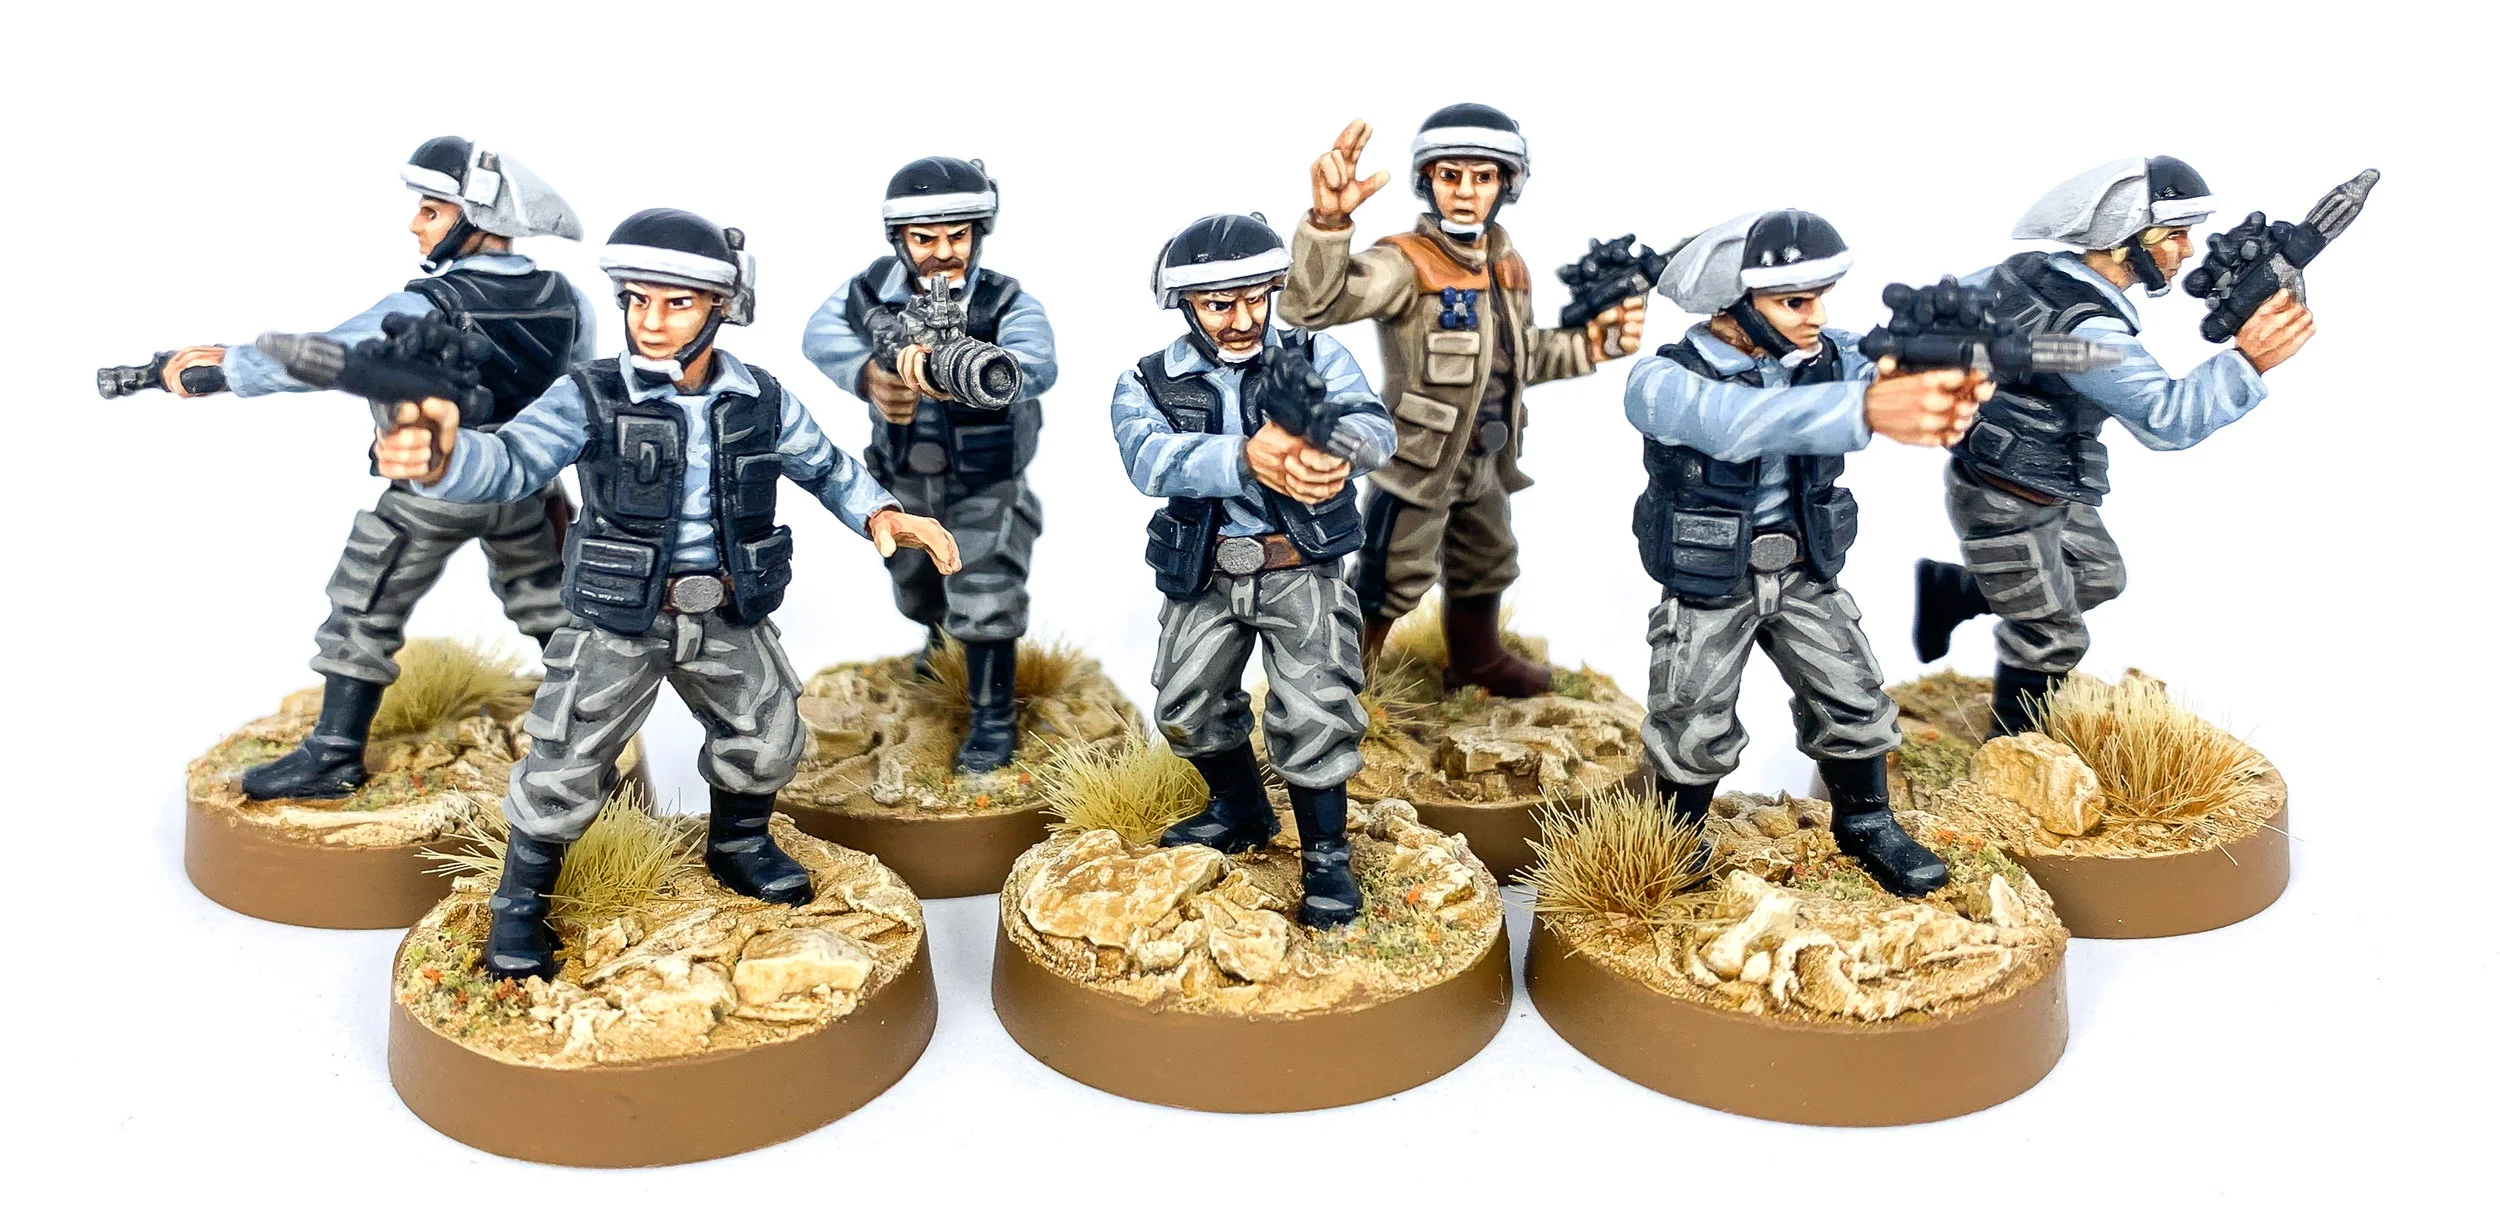
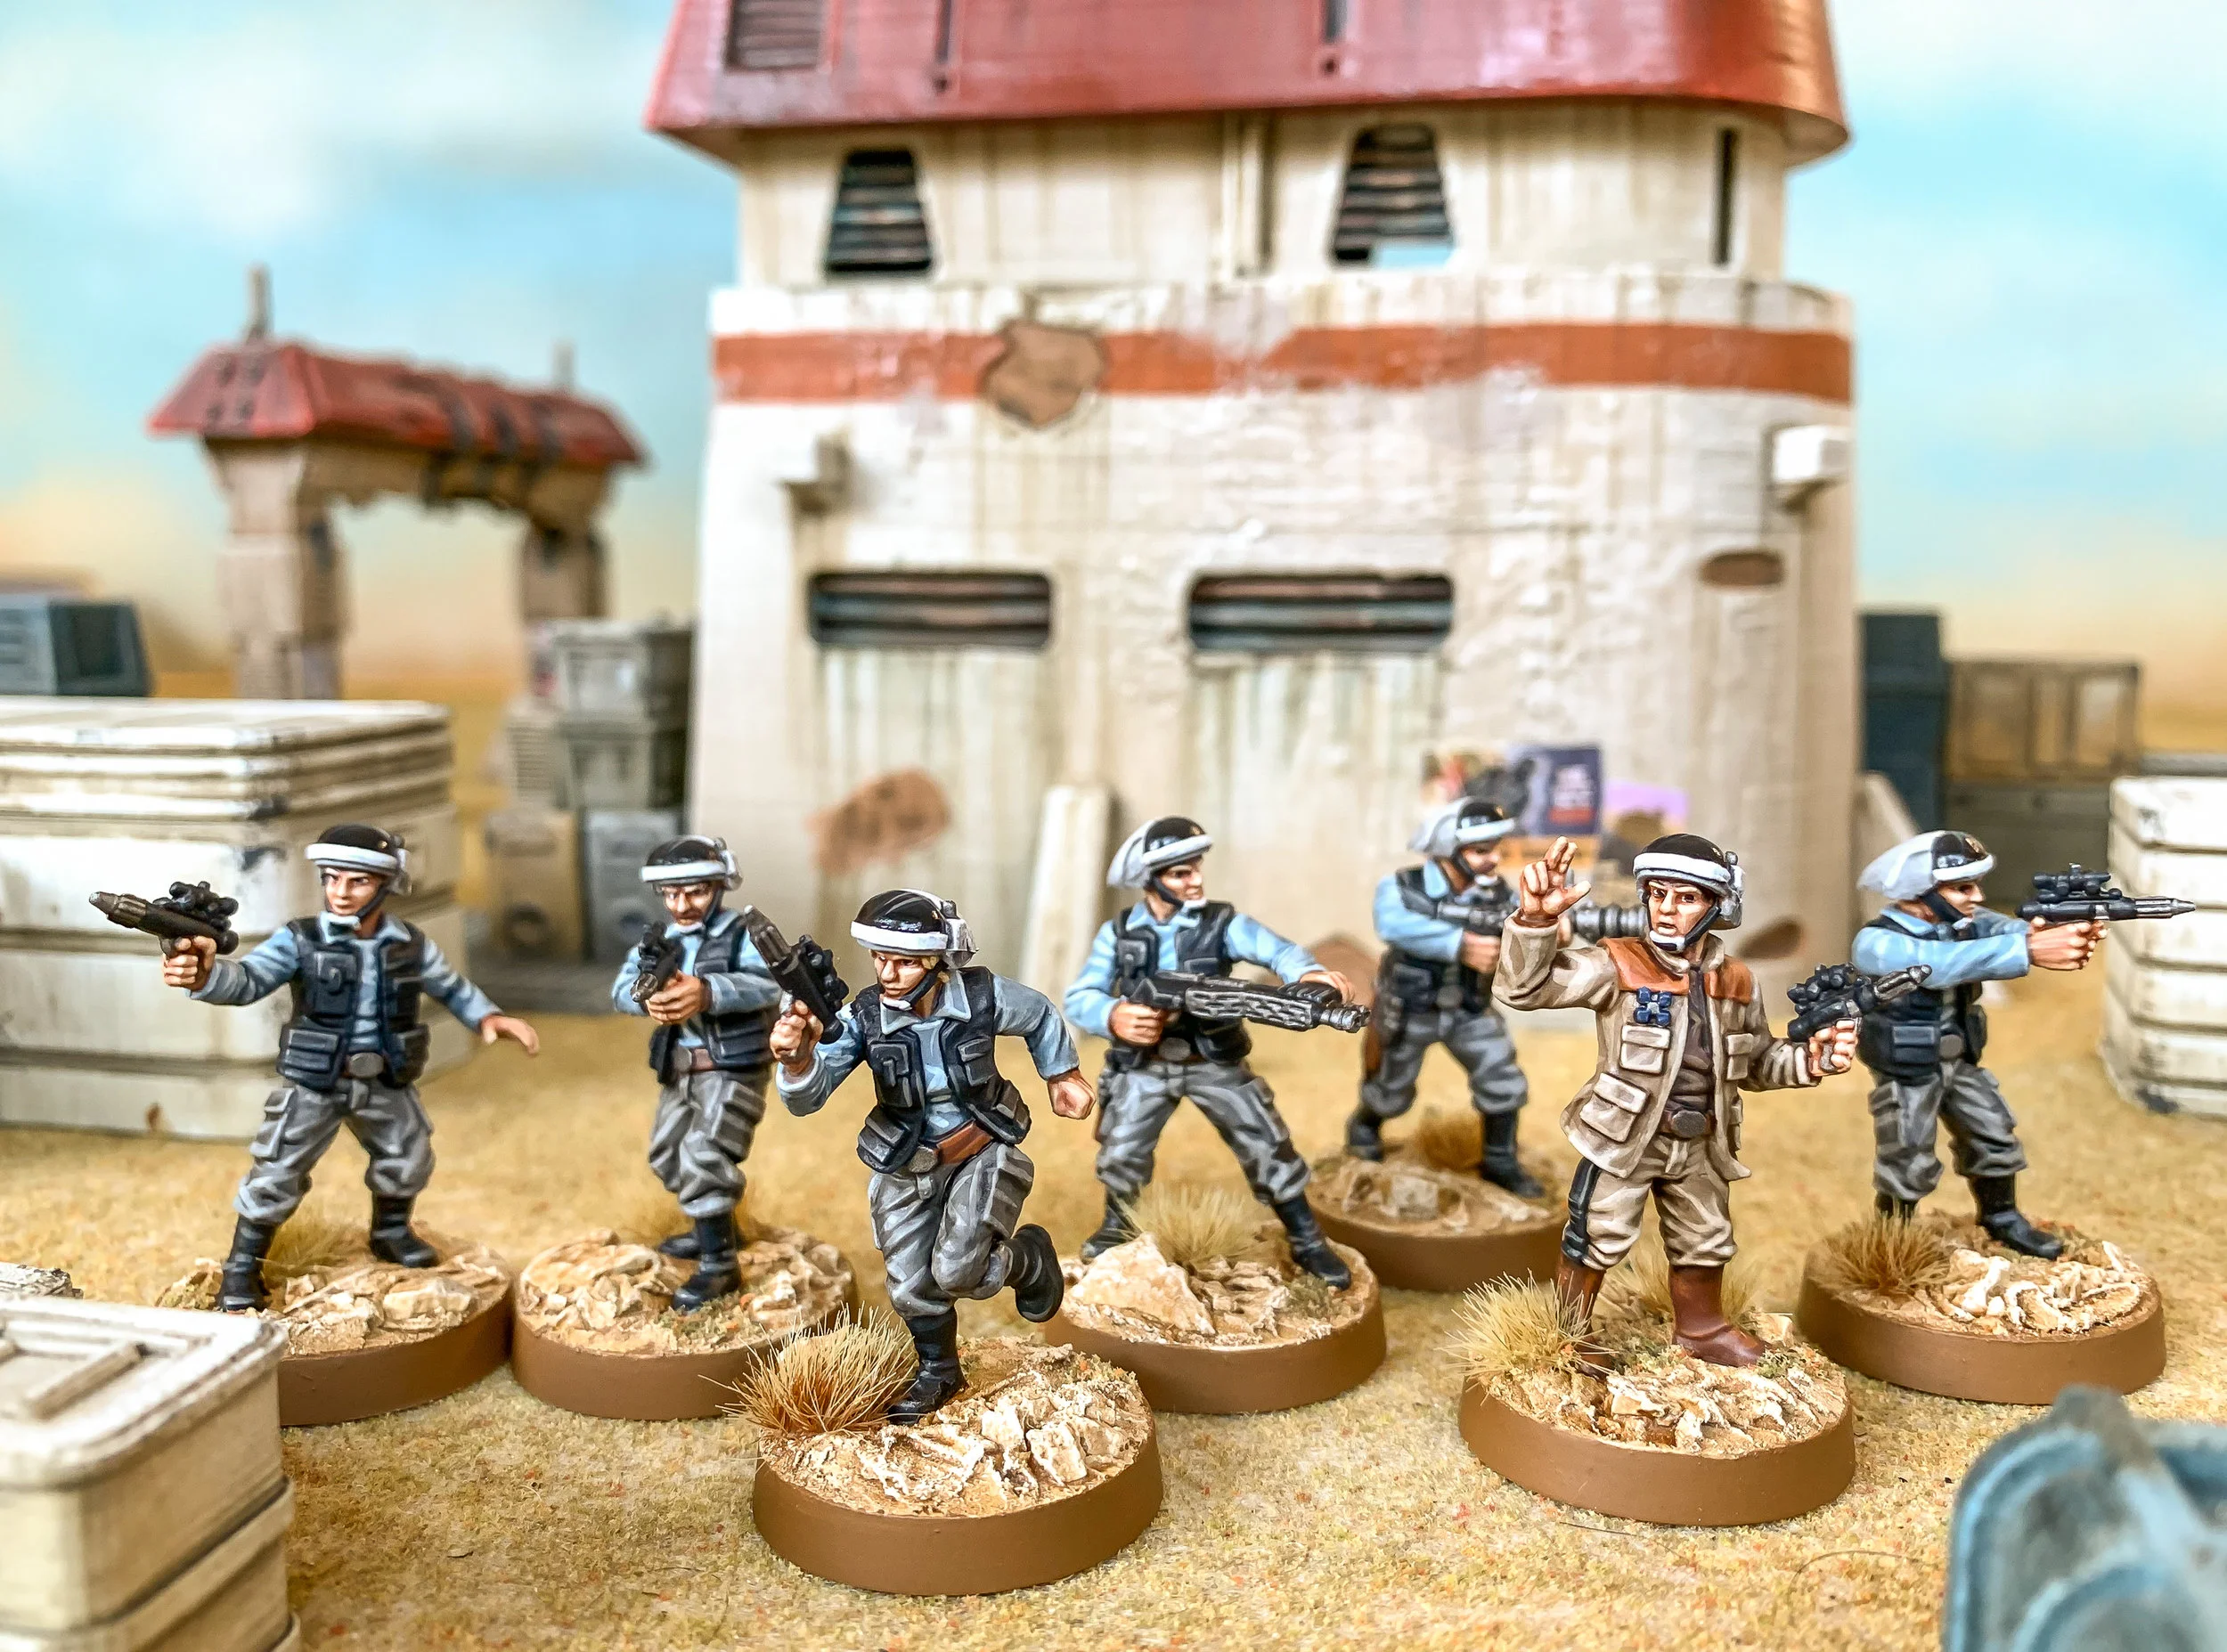
Here is the finished squad ready to get into trouble defending star ship corridors against marauding Sith Lords. I think the Fleet Troopers are great miniatures and add some nice variety to your Rebel forces.
Thanks for checking out this painting guide.
-Bryan
