
WWII German Gebirgsjäger painting guide

WWII German Gebirgsjäger
Bryan’s step by step painting guide
Hi guys, welcome to another step-by-step painting guide. I really enjoyed painting up this squad of German mountain troops, so made sure to record my process. These models are great sculpts that are easy to paint and are full of character. What follows is a guide, broken down into easy to replicate stages. I worked on all 10 models at once in a batch painting process.

Step 1 - Coloured spray primer
Begin by priming your models with Skeleton Bone spray (Army Painter). This will lay down the undercoat and a good neutral base colour in one easy step. Normally with other types of German troops I would use a darker undercoat but the Gebirgsjäger have a lot of lighter coloured clothing mixed in so it’s easier to get a better paint coverage with this lighter basecoat.

Step 2 - Base colours
Skin: Cadian Fleshtone (Citadel)
Boots: Rhinox Hide (Citadel)
Rifle stock & water bottle flask: Flat Brown (Vallejo)
Khaki Anorak: Khaki Grey (Vallejo)
Rucksack & SMG ammo pouches: German Camo Beige (Vallejo)
Rucksack straps: Flat Brown (Vallejo)

Step 3 - More base colours
Now the darker of the basic colours are applied. These darker colours may need two coats of paint to give a solid coverage over the light primer. Make sure you thin down your paint slightly when doing these two coats.
Trousers, cap and wind parka: German Field Grey WWII (Vallejo)
Gaiters, socks, gloves, gas mask canisters: Black Green (Vallejo)
Webbing: Abaddon Black (Citadel)
Gun barrels, water bottle lid & mess tin: Leadbelcher (Citadel)


Step 4 - Washes
Now it’s time to begin adding some depth in the shadow areas using acrylic washes. Simply apply the washes listed below using an older brush that’s medium to large in size, watering down the wash slightly as you apply them.
Skin: Reikland Flesh (Citadel)
Khaki Anorak: Seraphim Sepia (Citadel)
Everything else: Strong Tone (Army Painter)
Gun barrels: Nuln Oil wash (Citadel)

Step 5 - Highlights
After the previous step added darkness to the shadows it’s now time to add the lighter shades by carefully painting on highlights to the raised areas of the model. You’ll definitely need a fine detail brush for this, I, for example, used a 00 size from Windsor & Newton Series 7. When you water down these colours use an older brush to do so, don’t wreck your fine detail brush with this task. Most areas were highlighted with two successive highlights.
Skin: Kislev Flesh (Citadel), then Flayed One Flesh (Citadel)
Boots: Rhinox Hide (Citadel)
Rifle stock: Doombull Brown (Citadel) then Orange Brown (Vallejo)
Khaki Anorak: Mix of 50/50 Khaki Grey (Vallejo) and Iraqi Sand (Vallejo)
Rucksack & SMG ammo pouches: Mix of 50/50 German Camo Beige (Vallejo) and white
Rucksack straps & water bottle flask: Doombull Brown (Citadel) then Tuskgor Fur (Citadel)
Trousers, cap and wind parka: See Field Grey box out below
Gaiters, socks, gloves, gas mask canisters: German Uniform (Vallejo)
Webbing: German Grey (Vallejo)
Insignia (cap eagle and edelweiss badge): Stone Grey (Vallejo)

Step 5.2 - Field Grey step by step
Here is the full steps for one way to paint the distinctive German uniform colour of WW2. Note steps 1-2 have already been applied by this stage if you are following this guide;
1. Basecoat & wash: German Field Grey WWII (Vallejo) then Strong Tone wash (Army Painter)
2. Highlight 1: German Field Grey WWII (Vallejo)
3. Highlight 2: Green Grey (Vallejo)
4. Wash/glaze:Storm Cloud Blue wash (Secret Weapon Miniatures)
Step 6 - The bases
With the mini painted lets now look at the bases. You can, of course, do these in any way that suits your tastes. I have chosen a medium earth base and some grey granite rocks as I intend for my Gebirgsjäger to be fighting in autumn in the Carpathian mountains, so not high alpine or full winter, so no snow.
Earth: Flat Earth (Vallejo) then drybrush with Iraqi Sand (Vallejo)
Rocks: Eshin Grey (Citadel) then drybrush with Stone Grey (Vallejo)
Base trim:Rhinox Hide (Citadel)

Step 7 - Matt varnish and basing material
With the entire model painted you should now consider varnishing to protect your models from the hazards of tabletop gaming and grubby fingers. I used a matt varnish spray, Testors Dullcoate. The last touch is to add some flock and other basing material to really set the scene. I used grass tufts from a Gamers Grass, dark green clump foliage from a model railway store and birch tree seeds for the fallen leaves, to give that Autumn look.
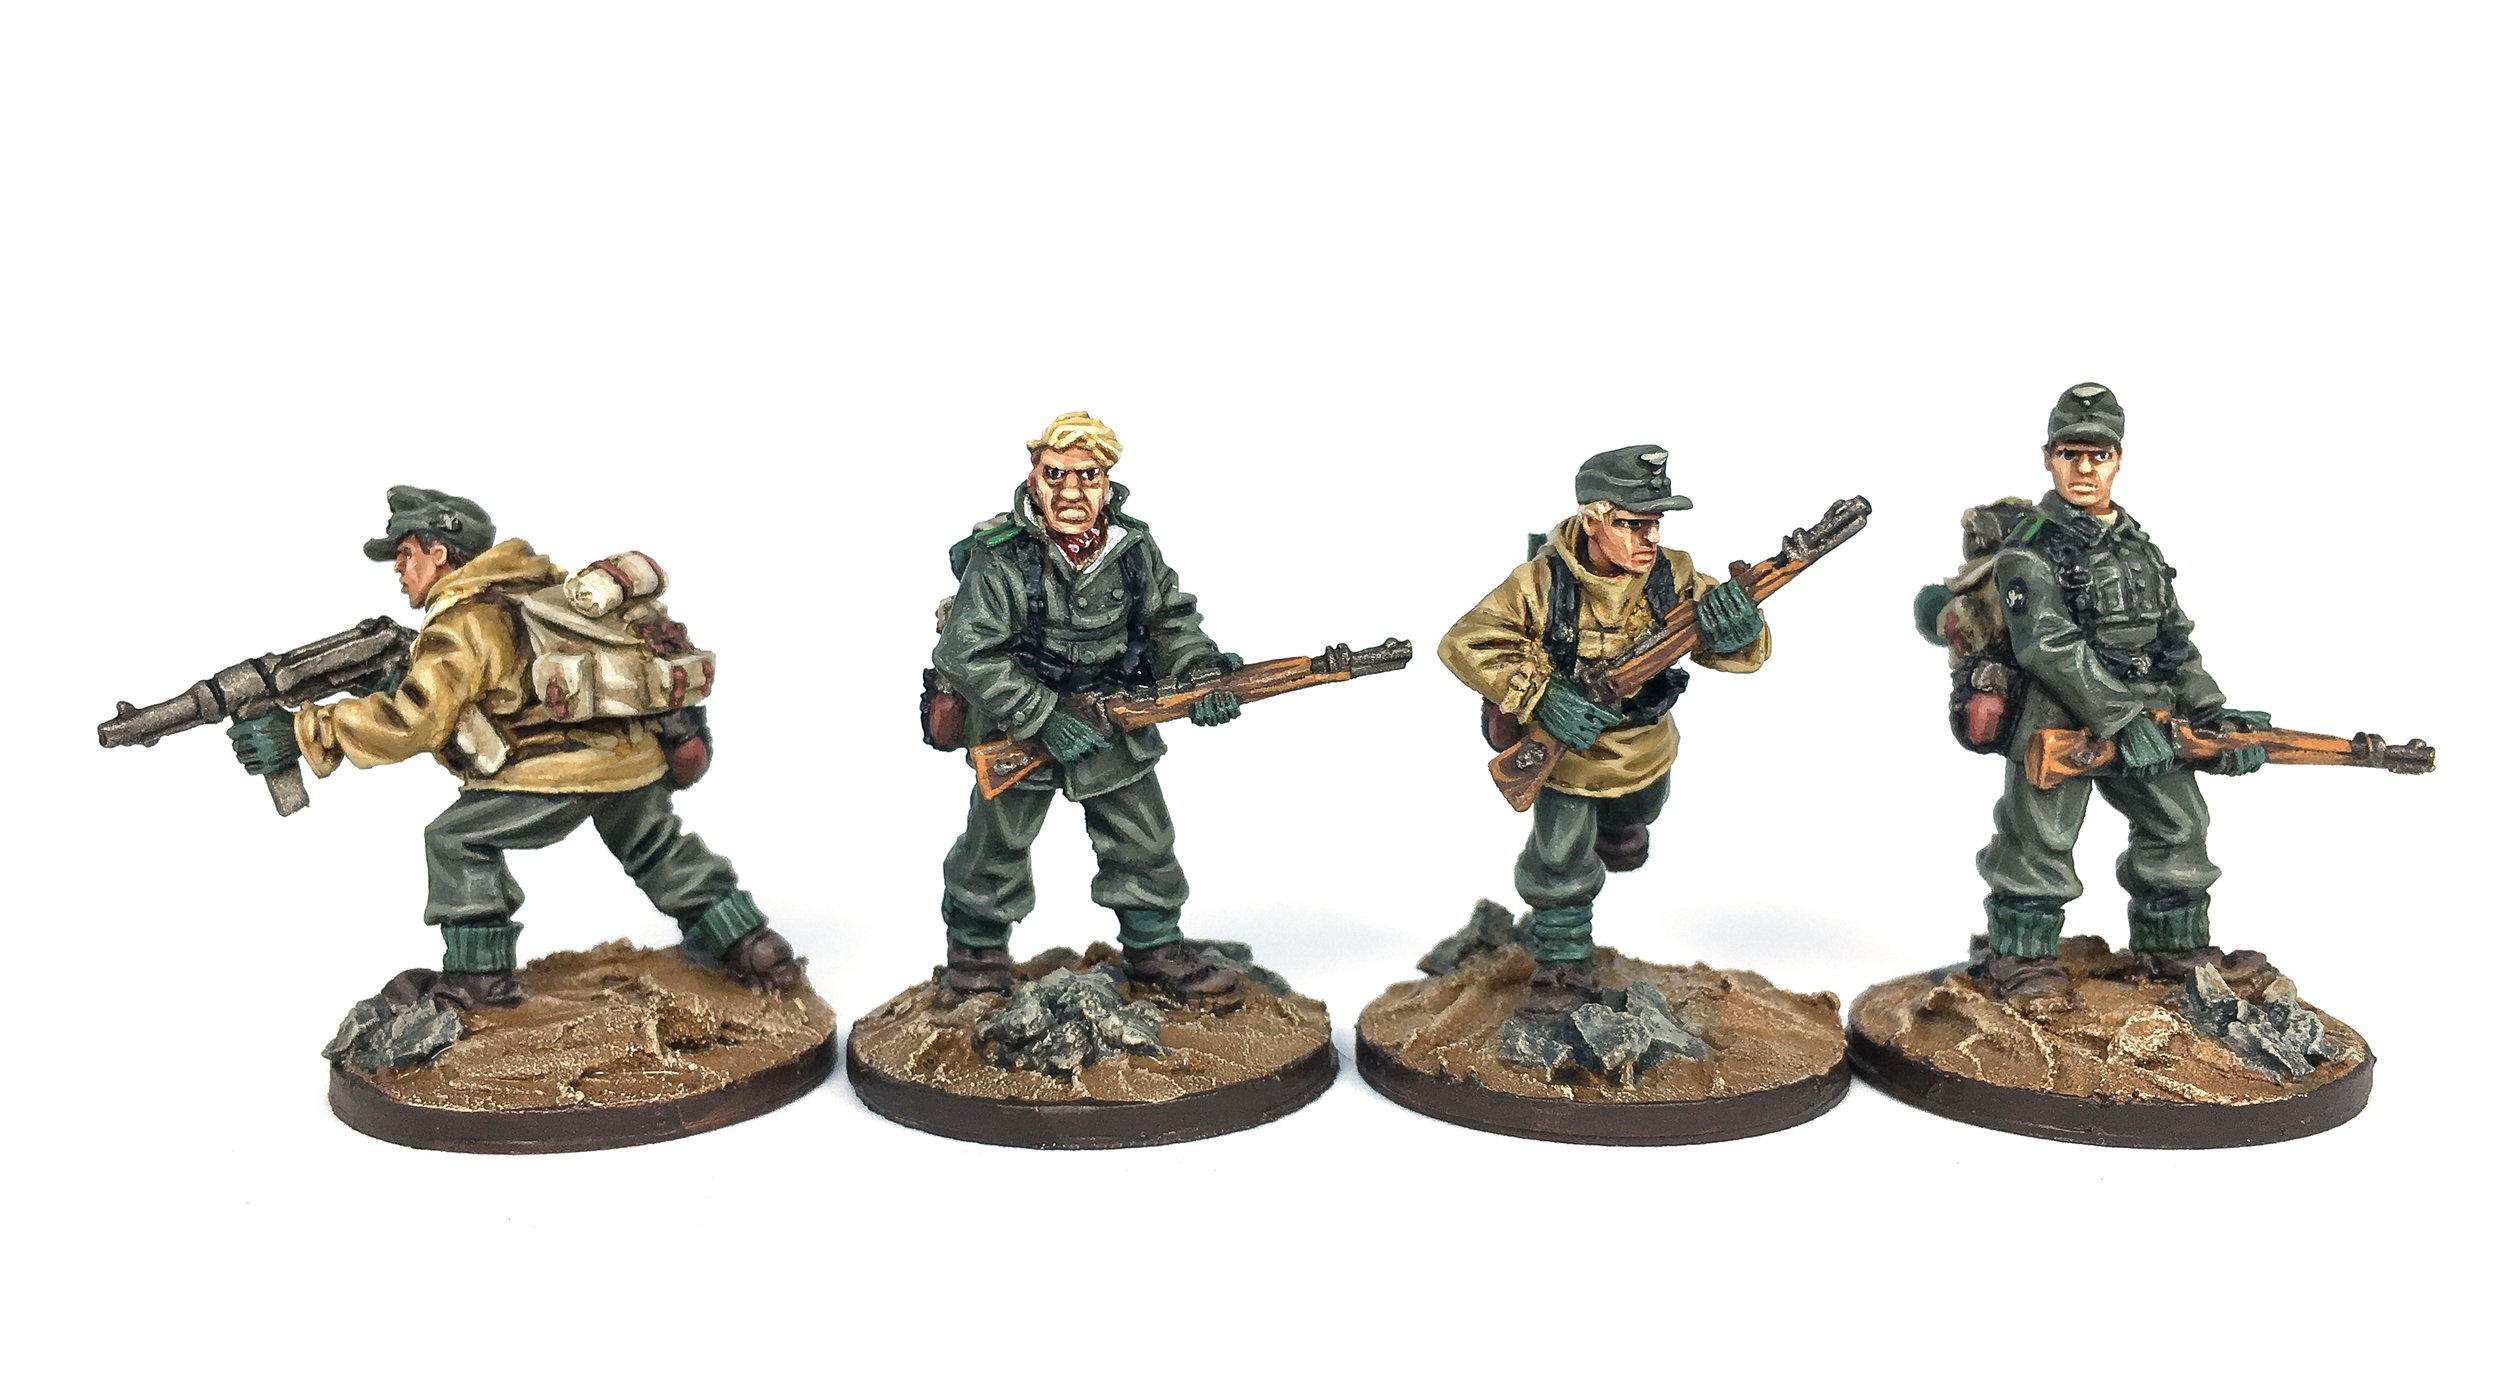
Here is the finished squad plus a few close-ups on these great miniatures. The badge there is the actual edelweiss cap badge the Gebirgsjäger wore.


Thanks for checking out this painting guide.
-Bryan