
Why 3D Printed Terrain is so great - A Compound for Afghanistan
I have owned a 3D Printer now for coming up to 2 years. My main motivation for purchasing a 3D Printer was to produce wargames terrain. MDF kits are great but I feel they will be a thing of the past as technology evolves, the hobby evolves and 3D printing becomes more mainstream.
Now I for one do not enjoy assembling MDF kits. I find assembling them can be a long drawn out process and they look rather flat and dull on completion. I understand not all kits are like this but in my experience I have been less than impressed with them. Being MDF, they are fragile and are prone to warping.
So why should I get frustrated assembling a flimsy MDF kit when I can just hit print and a few hours later I have some great looking terrain! It isn’t that simple of course and there is an almost endless source of tutorials and guides on the internet to help you out but with a bit of patience, experimentation and willingness to learn, you can master 3D printing fairly fast. I will also mention there is countless buying guides online. I have a Prusa Mk2S FDM printer… that’s the one that prints lines. FDM printers are ideal for printing wargames terrain.
Depending on the 3D model and your printer settings those lines can sometimes be seen. The following example is how I took a flat minimal textured surface of a 3D printed model and turned it into an Afghanistan Compound fit for any battle on the tabletop.
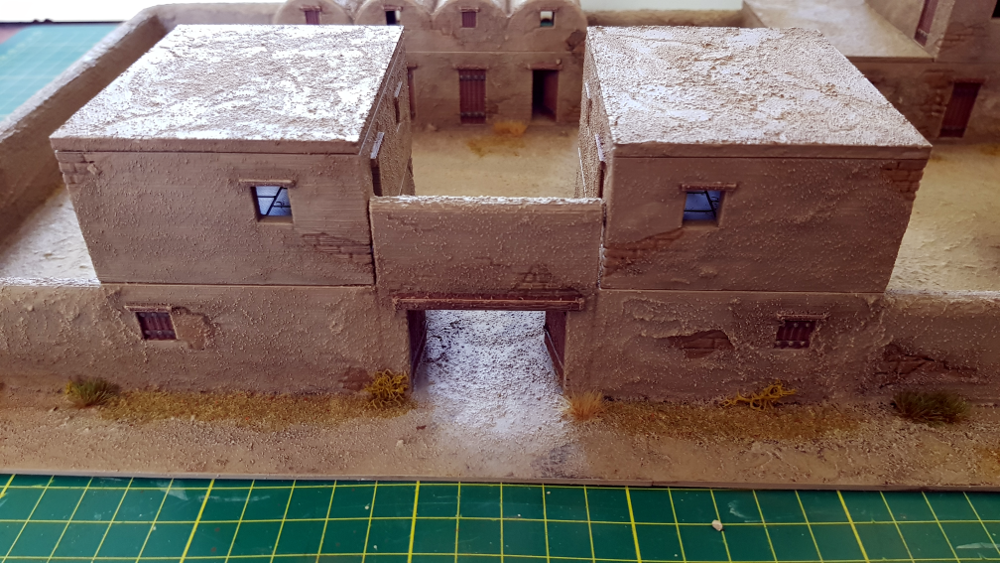
This compound is from 3D Print Terrain which has had many a successful kickstarter and also has a website where the files can be purchased from. There is also some licensed printers out there for you if you like the look of the terrain and do not have a 3D printer. The compound is painted for the 1/72 scale or 20mm Miniature size. I found this to be a sweet spot in terms of aesthetically great looking miniatures and saving much needed space for storage!
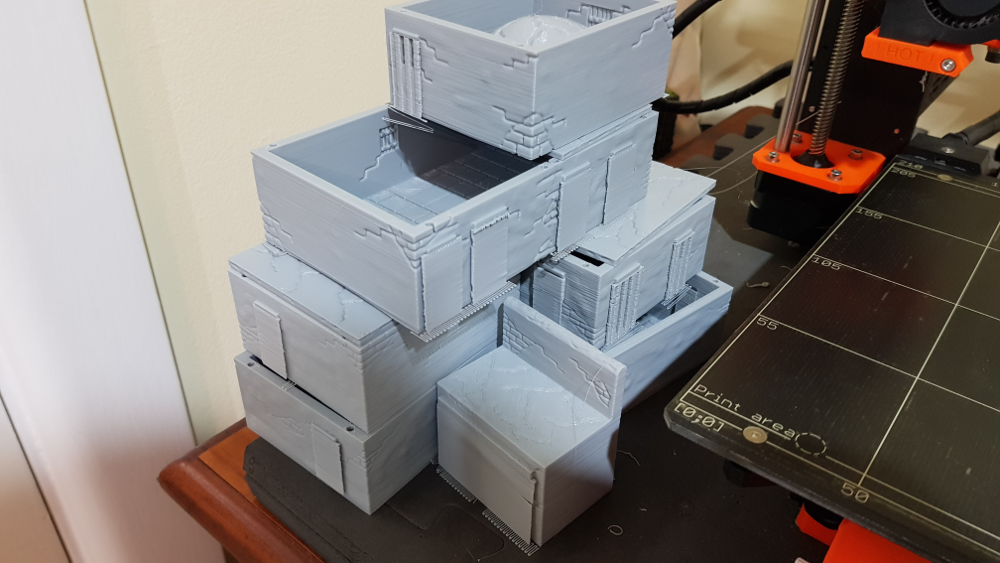
Now this photo does not show us much. It shows the corner of my 3D Printer and a whole lot of flat surfaced plastic with odd looking bits attached to it and doesn’t really represent the end product. These are supports I added to the print for door overhangs and windows etc. I print with cheap PLA filament that I purchase off ebay.
Once all the files were printed, I cleaned them up by removing the supports and inserting magnets for modularity. The supports literally crack off and it is quick and easy to do. The great thing here is that the holes for the magnets are part of the design so you don’t need to drill them out. I inserted 1mm x 2mm rare earth magnets.
I also played with a layout before I committed to glue. I also decided I would mount this on 2 x A4 pieces of plasticard that I had laying around.

Once happy with the layout I glued it all down using super glue. I ensured the gap between the two pieces of plasticard had some overlap from the 3D printed models to create a sturdy base.

The next step saw me using some pre-mixed tile grout, some PVA glue and some water to create the texture for the walls. This texture hides the lines created by the printer and helps the model look more natural. The ration to grout:PVA:Water would be around 5:2:1. Experiment to find the perfect consistency. This is dabbed on with a brush. This provides superior strength to your project. I have dropped a separate project done like this on a timber floor and not even a chip came off. If I was to do the same with MDF I would be getting out the PVA glue as I am sure it would break. The combination of a 3D Print and my texturing technique will ensure your terrain lasts a very long time.
Once dry I give it a prime with Rust-Oleum Camouflage Khaki spray paint.

From there I just drybrushed in lighter colours and added some thinned down oils to create various depths of colour to the base and the textured walls. All the details were quickly painted and washed.
I added some tufts, flock and various other basing products to break-up the dull colours of the paint job.
This makes a terrific durable centre piece for the table. As it is magnatised all the levels and roofs can be removed for gameplay.


Dave